Acclimating New Fish: Drip vs. Float Method
So, you just brought home a new finned friend or maybe a whole squad of them. Exciting, right? But before you let them free into your tank like it’s some underwater Hunger Games, let’s talk about a serious step that often gets rushed or skipped — acclimating new fish. This step is a matter of life and death… for the fish. Plus, you didn’t just spend time, money, and emotional investment to lose your new aquatic pals to something as avoidable as shock!
So, whether you have a freshwater or a saltwater tank, we’ll break it down for you. Here, we explain what acclimation really means, why it matters, and the two most popular methods — drip vs. float — so you can choose what’s best for your setup and your species.
Why Acclimating New Fish Matters
Imagine going from a hot tub to an ice bath without warning. Not fun, right? That’s essentially what it’s like for fish when they’re plopped into a tank without proper acclimation. Fish are sensitive to changes in:
- Temperature
- pH levels
- Ammonia, nitrite, and nitrate levels from the nitrogen cycle
- Salinity (for brackish/marine tanks)
- General water chemistry
These differences between your tank and the water in their bag may seem tiny to you — but to fish, they’re massive. When acclimating new fish properly, it helps reduce stress (for your fish and yourself), prevents shock, and gives them the best shot at survival and thriving.
Method 1: The Float Method (aka the Classic)
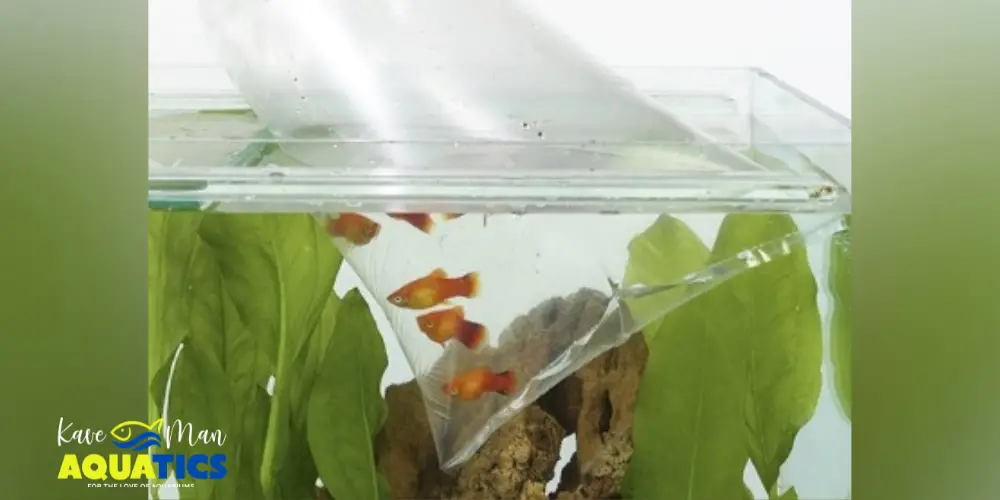
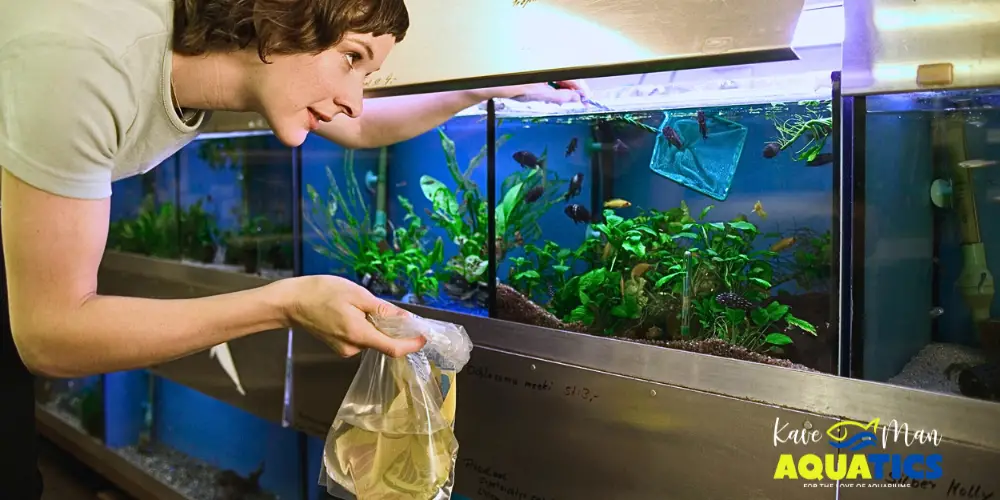
The float method is often the go-to for beginners. It’s simple, quick, and gets the job done well enough in many cases. Here’s how it works:
- Turn off tank lights: Reduce stress. Fish are not fans of sudden lighting changes or “spotlight entrances.”
- Float the sealed bag in your tank: Let it bob like a lazy river for 15 to 30 minutes. This equalizes temperature between the bag water and your tank.
- Open the bag and add tank water: Every 5 to 10 minutes, add a small amount (about 1/4 cup) of tank water into the bag. Do this for 20 to 30 minutes.
- Net the fish and release: Use a net to gently transfer the fish into the tank. Don’t dump the bag water into your tank — especially if it came from a pet store tank.
- Dispose of bag water: That water’s been on a road trip. No one needs its baggage.
Pros of the Float Method
The float method may be the best option for you as it’s:
- Easy for beginners.
- Fast — you’re done in under an hour.
- Great for hardy fish that adapt well.
Cons of the Float Method
This method may not be for you because:
- It doesn’t acclimate as slowly or gently to water chemistry.
- Of the risk of introducing store water contaminants to your tank.
- It’s not ideal for sensitive or exotic species.
Method 2: The Drip Method (for the Patient Pros)
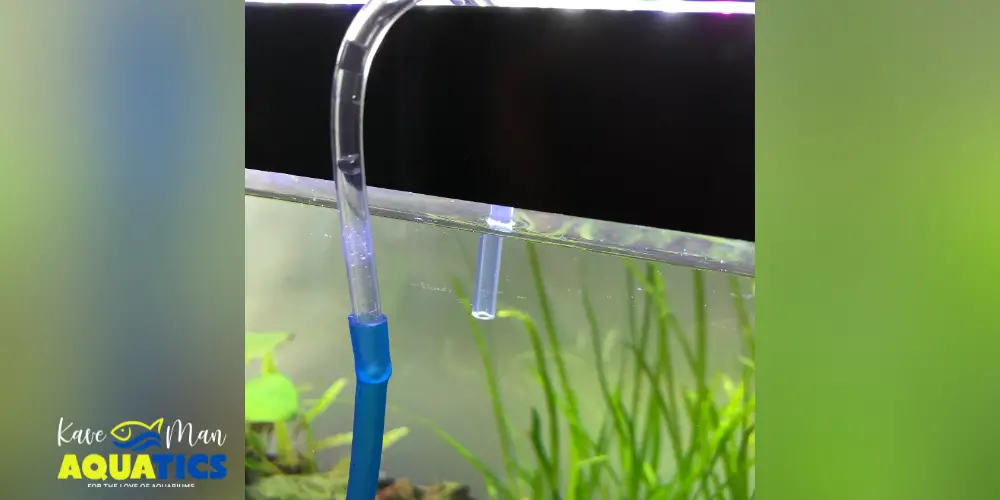
If the float method is the microwave dinner, the drip method is the slow-cooked gourmet meal. It’s a bit more work but way gentler on the fish — especially those with “diva-level” sensitivity to water changes. Here’s how it works:
- Set up a quarantine or acclimation bucket: Ideally, use a clean, dedicated container. No soap residues allowed!
- Transfer the fish and bag water: Gently pour the fish and the bag water into the bucket. Keep an eye on the fish so no one jumps out.
- Start the drip: Use airline tubing to create a siphon from your tank to the bucket. Tie a loose knot or install a drip valve to control the flow. You’re aiming for 2 to 4 drops per second.
- Drip for 1 to 2 hours: The longer, the better. Let the tank water slowly replace the original bag water.
- Net and release the fish into the tank: Just like in the float method, leave the acclimation water (and bag) behind.
Pros of the Drip Method
The drip method may be the best option for you as it’s:
- A gentle transition, especially for sensitive fish (like discus, shrimp, or saltwater species).
- Great for adjusting to changes in pH, salinity, and chemistry.
- Less stress, which equals higher survival rates.
Cons of the Drip Method
This method may not be for you because:
- It takes time — this isn’t for the impatient.
- It needs a little DIY or gear setup.
- It’s not always necessary for hardy freshwater fish.
So… Which Method Should You Use?
It depends! Here’s a quick cheat sheet:
| Situation | Method |
| New to fishkeeping | Float method |
| Acclimating hardy freshwater fish | Float method works fine |
| Adding expensive, delicate, exotic fish | Drip method, always |
| Bringing home shrimp or saltwater fish | Drip method, hands down |
| Fish already look stressed in the bag | Drip method to be safe |
The Do’s and Don’ts of Acclimating New Fish
Whether you drip or float or have a fresh- or saltwater tank, there are a few golden rules to follow — and a few habits to break if you want your fish to thrive. Let’s keep it real and run through the musts and must-nots of acclimating new fish.
Do
Here are five do’s of acclimating new fish:
- Use a quarantine tank: If you have a quarantine tank, use it! It’s the best way to prevent potential diseases from spreading to your established tank. (PS: Did you know that even your coral needs to be quarantined? Yep!)
- Turn off tank lights during acclimation: Fish don’t like a dramatic spotlight. Keep things dim to reduce stress.
- Stay calm and quiet: Sudden noises, poking, tapping, or doing the Macarena in front of the tank = stress city.
- Observe your fish after release: Watch how they swim, breathe, and interact. A little hiding is normal. Floating sideways? Not normal!
- Be patient: Whether you’re dripping or floating, rushing the process defeats the whole purpose.
Don’t
Here are four don’ts of acclimating new fish:
- Don’t dump bag water into your tank: Seriously. That water might be carrying bacteria, parasites, or just gross chemistry from the store.
- Don’t skip acclimation just because your fish “look fine”: Stress isn’t always visible — until it’s too late.
- Don’t rush the process: That 5-minute shortcut could cost your fish their life. Respect the transition.
- Don’t use a dirty container for the drip method: Leftover soap or detergent? Instant fish disaster. Always use a clean, fish-only bucket or container.
Special Considerations: Saltwater and Inverts
Saltwater fish and invertebrates (like shrimp, snails, and corals) are “extra” when it comes to water chemistry. Sudden changes in salinity can be fatal.
If you’re acclimating marine species, the drip method is almost always recommended. Some hobbyists even test the salinity in the bag vs. the tank and adjust the drip accordingly using refractometers. (Yeah, it gets that intense.)
Make It a Smooth Landing and Level Up Your Aquarium Game
Whether you go with the float method or drip method, remember the goal — minimize stress, match the environment, and give your fish the warmest welcome possible. Because a happy fish is a healthy fish! Fishkeeping doesn’t stop after acclimation.
If you’re tired of second-guessing compatibility, forgetting pH checks, or Googling “how many fish is too many fish?” — it’s time to meet Aquabuildr. Aquabuildr is the first-ever intelligent tank-building app designed by aquarium nerds (like us) for fish lovers (like you).
Download Aquabuildr on the Google Play Store and Apple App Store and say goodbye to guesswork and hello to thriving fish!
Best Saltwater Fish for Beginners
Discover the best saltwater fish for beginners! Explore colorful, low-maintenance fish that are perfect for starting your first saltwater tank.
7 Easy Ways to Keep Your Aquarium Cool This Summer
Don’t let summer heat stress your fish! Here’s how to keep your aquarium cool, calm, and collected all season long.
Do You Really Need a Protein Skimmer in Your Saltwater Tank?
Wondering if a protein skimmer is worth it? Find out if your saltwater tank really needs one and what it actually does for your setup.
