How to Replace Aquarium Substrate in an Established Tank
Ah yes, to replace aquarium substrate… what a lovely experience (not really). There is a purpose behind having substrate in your aquarium, so don’t think you can skip it.
The substrate serves as a bacteria medium, your fish’s habitat, a way for your live plants to take root and it even serves as a way to decorate your tank.
Table of Contents
- Before You Replace Aquarium Substrate
- How to Replace Aquarium Substrate
- How Often Should You Replace Aquarium Substrate
- Different Types of Aquarium Substrates
Before You Replace Aquarium Substrate
Before replacing the substrate, it’s best to make sure that you have everything you need beforehand. That includes some tasks that you need to do weeks and days in advance.
Weeks before
Filter: Ensure that you haven’t recently changed or cleaned your filter. A new/clean filter together with a new substrate can make it difficult for the beneficial bacteria to adjust. Wait two weeks after changing/cleaning your filter to replace the substrate.
Days before
Water: A couple of days before the replacement, you should top off your tank’s water completely.
Water parameters: About a day before the replacement, test whether the levels of ammonia and nitrates are at zero. If they are, great! You can proceed. If not, you need to correct the issue before the replacement.
No food: Try not to give your fish any food one day before the substrate replacement. It makes the process much easier and cleaner when adding your fish to the temporary tank. But if you do choose to feed them, it’s a-okay – it just makes waste removal after the whole process difficult.
Temporary tank: Have a temporary tank ready to keep your fish while the substrate is being replaced. It’s always handy to have an additional tank ready; especially if you wish to use it as a quarantine tank.
How to Replace Aquarium Substrate
Let’s get into it on how to replace aquarium substrate! But first…
Prepare the Temporary Tank
It’s the day of and you’re ready to replace the aquarium substrate. But first, get your temporary tank ready:
- Water: Take the water from your main tank and add it to your temporary tank (about 50%). Ensure that it’s enough water for your fish to swim in the temporary tank. Using water from your main tank makes it easier for your fish to adjust and have them stress less. Remember to turn off the filter before moving the water.
- Decor: Move all the live plants, rocks, and all other decor from the main tank into the temporary tank. The benefit of moving all the decor is that they’ll retain the beneficial bacteria that grew on them in the main tank. Once the substrate is replaced, it’ll be easier for the tank to resume its original environment.
- Fish: Next up, the fish! Move your fish friends from the main tank into the temporary tank. It is stressful for the fish to move between tanks, but it can be more stressful to keep them in a tank that’s about to have its substrate replaced.
Replace Aquarium Substrate
Now that you have your temporary tank all set up and everything moved into it, it’s time to replace the substrate.
- Scoop out ALL of the old substrate and place it into a bucket to throw out afterwards. In comes the manual labor! “Scoops ahoy!”
- You can even take this opportunity of clearing out the entire surface of the tank and clear up the remaining debris with a vacuum (we want a nice clean tank).
- Wash the new substrate before adding it to the main tank. Although they’re often pre-washed, most substrates are very dusty and need to be cleaned thoroughly (unless you immediately want a cloudy tank). Some might introduce unfamiliar bacteria to your aquarium and may harm your fish. Rather be safe!
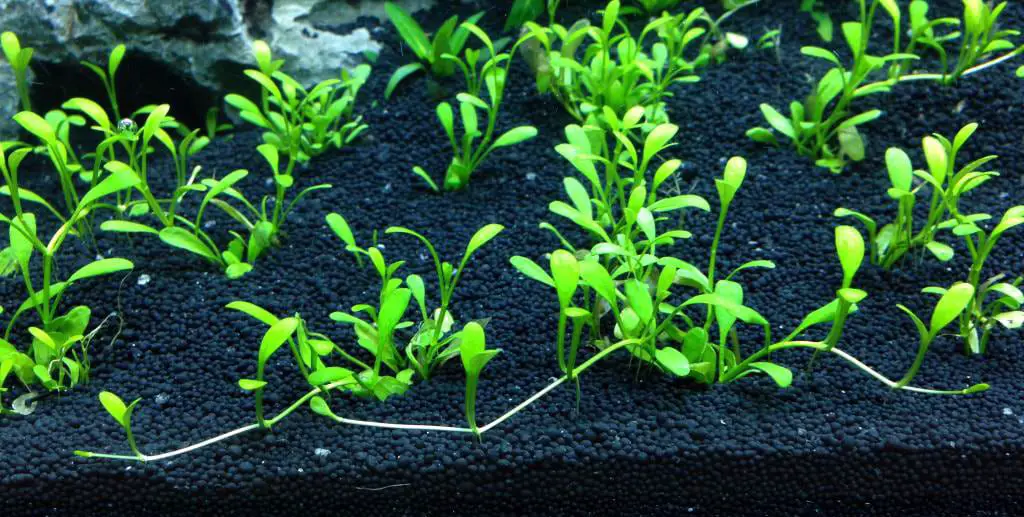
- Pour the new and washed substrate into the main tank. The amount of substrate depends on your live plants, fish, and aesthetic preferences.
- Once the new substrate is added, it’s time to move all the water, decor and fish back into the main tank. Try not to feed your fish right away. If you feed them too much while they’re stressed and in discomfort, it can make them ill.
- We also recommend adding Seachem’s Prime at this stage as it helps with the new environment.
- Afterwards, keep an eye on your tank’s water parameters. Test the ammonia and nitrate levels regularly. A slight rise is okay with a substrate replacement. If the numbers don’t go back to zero after 2-3 days, you will have to treat the tank until it does.
Things To Keep In Mind
Replacing substrate is no laughing matter. It can take a while and is exhausting, however, don’t be tempted to replace a little bit of substrate at a time. It’s better to clean up all the old substrate and replace it completely in one go.
In addition, let your main tank sit for a while after removing the old substrate. This helps clean out any sand or debris that was floating around. Once it’s all settled at the bottom, it’s ready to be vacuumed up!
Here’s my experience with replacing my aquarium’s substrate which also raised my pH levels safely.
How Often Should You Replace Aquarium Substrate
It’s best to avoid replacing your aquarium substrate as much as possible. Most of the beneficial bacteria are found in the substrate and regularly replacing the substrate can have negative consequences.
Also, new filter technology allows you to go on for a long time without having to replace the substrate.
It also depends on the number of fish that you have in your aquarium. The more fish you have, the more frequently you need to clean the tank through water changes and vacuuming or replacing the substrate.
Here are a couple of scenarios where you might need to replace your aquarium’s substrate:
- Visible dirt/waste: If you can see a lot of waste, it’s probably time to vacuum the substrate. However, just because the surface of the substrate is clean after a vacuum, doesn’t mean that the bottom is clean too. Waste particles can linger underneath the substrate (especially if you have fish who like to burrow). Watch out for that ammonia!
- New live plants and fish: It’s important that you pair the right substrate that is preferred by the fish and/or live plants. Make sure to do your research! Live plants require a soil bottom rather than gravel. Some bottom-dwelling fish require smoother substrate so they don’t get injured from sharp gravel.

Different Types of Aquarium Substrates
Variety is the spice of life! There are several substrate options to choose from that depend on your fish, live plants and tank aesthetic preferences. The most commonly used substrates are:
- Pebbles: These are the largest substrate that you’ll get. Pebbles can be made from almost any material – river rock, quartz, glass, and even colored plastic that glows in the dark. Pebbles aren’t the best option for live plants though.
- Gravel: You can think of gravel as small pea-sized pebbles. Just like pebbles, gravel is available in a wide range of materials – you can achieve nearly any substrate design that you can imagine!
- Sand: Yes, just like beach sand! Sand is one of the most popular substrates used. It comes in a range of grain sizes and colors. Bottom-dwelling fish enjoy digging into the sand.
- Soil: Soil? As in muddy water? Nope. Substrate soil from your local fish store is specially formulated to prevent it from mixing with water. This is the type of substrate that live plants prefer.
- Water-changing substrates: There are certain substrates that make maintaining your aquarium a much easier task. This includes aragonite, peat, and vermiculite.
Conclusion
Even though replacing aquarium substrate is… eventful, it’s also very much worth doing. Now that you’re tank is settled and happy with its new substrate, do you know how to achieve crystal clear water?
