How to Install a 3D Aquarium Background in 7 Simple Steps
3D aquarium backgrounds can be an excellent addition to your aquarium – adding an extra layer of a fish’s natural habitat and your tank’s aesthetics. That said, they can be quite tricky to install.
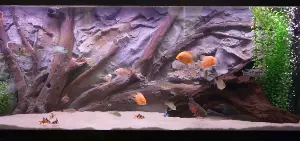
We’ve installed not only one, but two 3D aquarium backgrounds in both our African- and American cichlid tanks. And as a result, we’ve created 7 simple step-by-step instructions on how to install a 3D aquarium background that any fishkeeper can follow.
How to Install a 3D Aquarium Background
For the sake of TLDR (too long, didn’t read), lucky for you, we have a video you can follow:
Step 1: Get The Materials
Get your materials ready for the installation process. You’ll need the following items:

- Water Pump or Aquarium Siphon: This will help drain the water (the siphon can also be used to vacuum the substrate for any debris). The size of your tank depends on the type of pump you use, we recommend the following:
- For big tanks (>100 gallons): The Vivosun Aquarium Water Pump 2600 gallons per hour (GPH).
- For small tanks (<100 gallons): The Vivosun Aquarium Water Pump 800 GPH.
- Water Hose: A clear see-through hose, for the water pump, helps you see whether the water is flowing and if you accidentally sucked out a fish. We recommend the following hoses:
- The 50-foot Water Change Hose (1-inch inside diameter (ID) can be paired with the Vivosun Aquarium 2600 GPH.
- The 50-foot Water Change Hose (1/2-inch ID) can be paired with the Vivosun Aquarium 800 GPH.
- Bucket/s (optional): Can be used to capture the drained water; if you’re not draining your water down the drain or into your garden.
- 3D Aquarium Background: Ensure that you have rinsed the background for any dust and/or debris.
- Medications: Always dechlorinate your water after adding new tap water! The size of your tank depends on the type of medication you use, we recommend the following:
- For big tanks (>100 gallons): Seachem Safe.
- For small tanks (<100 gallons): Seachem Prime.
Step 2: Prepare The Tank
Next, you need to prepare your tank. Unplug your heater, filter, and wave maker if you have one, as your tank’s water levels will deplete during the installation process.
Please note that it may take a while to install your aquarium background. As a result, we do recommend that you keep at least one element running that provides some surface agitation to keep the water oxygenated.
Step 3: Drain the Tank
Now we’re going to drain the tank’s water. For the purposes of this article, we will be using the Vivosun Aquarium Water Pump to drain the water out of the aquarium.
You can also use an aquarium siphon to drain the tank. If you’re not familiar with using a siphon, read here on how to start and stop a siphon.
Draining the tank’s water will make room for the extra décor and make the installation a less messy process.
It’s recommended that you remove only about 50% of the aquarium water or to a level that you normally drain out during water changes.
Step 4: Make Space
Now that most of your water is drained; it is the perfect time to remove all other décors you already had in the tank (wood, rocks, caves, plants, etc). This will ensure that nothing gets in the way and none of your fish gets crushed.
Scrape your substrate away from the area you plan to install your aquarium background. You can use any tool; we used a clean dustpan!
By this time, you may have noticed some debris floating around as you scrape through your substrate. Hold on! We’re going to vacuum that in step # when the water levels are higher.
Step 5: Install the 3D Aquarium Background
Now you can install the 3D aquarium background to the back of your tank. Depending on its material, it will either be flexible or not. Naturally, we’d recommend going for a flexible material to make the process easier on yourself.
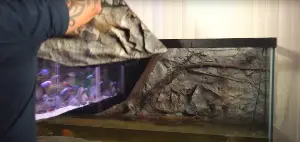
Of course, this will be stressful for your fish and you need to be extra careful not to crush or trap your fish during this process.
As you install the background, ensure that it fits nicely together – like pieces to a puzzle. That said, it may be best to keep one side a little open in the case that a fish does get trapped later on, that there is a space for them to escape (like we did with our African cichlid tank).
Step 6: Finishing Touches
Now that your aquarium background is installed (yay), it’s time to add the previous décor and potentially hide some of your equipment behind the background gaps.
Push the substrate back towards the back to secure the background in place.
Step 7: Refill Your Tank
Refill your tank’s water levels until it reaches the top. You can either use a water pump or an aquarium siphon. Luckily, some aquarium siphons, such as the Aquarium Python, have a valve mechanism and faucet connector to help make this step in the process run quickly and smoothly!
Before refilling your aquarium, always double-check that the water parameters and temperature are correct beforehand! The siphon/water pump should introduce a slow steady flow of new water into your tank.
As your water levels increase, you can use this opportunity to vacuum your substrate. If you need some help on how to vacuum substrate (sand and gravel), read this article that provides step-by-step instructions (with images).
Don’t forget to add a dechlorinator when adding the tap water which will chlorine, chloramine, and other harmful substances.
Use Seachem Prime for tanks under 100 gallons or use Seachem Safe for tanks 100 gallons and over.
The Best 3D Aquarium Backgrounds
If you haven’t decided on an aquarium background yet, we’ve got the best recommendation for you – Aquadecor!
Let’s be transparent here, this is a biased opinion. However, it’s based on our experience with them and their products.
Aquarium backgrounds are not cheap, so we talked to Aquadecor and they were nice enough to give anyone a 10% discount if they use the code Kaveman10 at checkout.
Get Crystal Clear Aquarium Water
Installing a 3D aquarium background will give that extra dazzle to any tank! And now you know exactly how to install one in your own tank. But what’s the next step?
Keeping your water crystal clear! If you want to learn more about how to maintain a crystal clear aquarium, then click on the button below to learn more.

-
Best Saltwater Fish for Beginners
Discover the best saltwater fish for beginners! Explore colorful, low-maintenance fish that are perfect for starting your first saltwater tank.
-
7 Easy Ways to Keep Your Aquarium Cool This Summer
Don’t let summer heat stress your fish! Here’s how to keep your aquarium cool, calm, and collected all season long.
-
Do You Really Need a Protein Skimmer in Your Saltwater Tank?
Wondering if a protein skimmer is worth it? Find out if your saltwater tank really needs one and what it actually does for your setup.
