How Often Do You Clean Your FX6?
The awesome Fluval FX6 canister filter is excellent for fish enthusiasts and people interested in the fish-keeping hobby. The unique combination of trays allows for a variety of media enhancing its functionality and giving you crystal clear-looking water. However, cleaning your FX6 setup is also crucial in keeping the canister safe for your fish and keeping it functioning smoothly for years to come.
If you wonder, “How often do you clean your FX6?” the answer, unfortunately, is that every tank is different. But if you are running carbon through your system, you should definitely be replacing that every month. Otherwise, in general, most tanks can wait for four months before going for a full FX6 cleaning session.
However, the appropriate time for cleaning your FX6 depends on the water conditions inside the aquarium, the fish diet you are using, and the bio load.
If you notice any reduction in your output flow rate, it is time to get started with cleaning your FX6 and making it livable for the fish. So, the answer to “How often do you clean your FX6” also depends upon your specific tank and its respective water conditions.
The FX6 is a powerful canister filter that will remove waste and debris and refrain from accumulating inside the aquarium. However, overstocked aquariums or unclean aquariums will shorten your filter cleaning windows so you must adjust accordingly.
Every Tank with an FX6 Is Different
The first thing you need to know is that every tank with an FX6 is different. There is more than one model of Fluval Canister Filter, and each one comes with equally unique maintenance requirements.
While some tanks with FX6 may require constant maintenance, others can run for six months without any problems.
I waited four months before going for a full servicing session. However, I do keep them in good shape by doing scheduled water changes and substrate vacuuming to remove excess waste and detritus weekly. This scheduled tank maintenance helps in prolonging the filter cleaning schedule.
There are various conditions and elemental factors that influence the cleaning routine of these filters. The tank owner should understand the different elements from water conditions to bio load before jotting down a cleaning schedule for their respective tank with an FX6.
Your Bio Load Matters
Short for biological load, bio load is the waste accumulated in the water column of your tank. To better understand the bio load in your tank, here are a few examples:
- Fish Poop
- Leftover food
- Decaying plant matter
- Excretions from microorganisms, bacteria, and coral
Some species of fish can be more wasteful than others, like my African Cichlids for example. In an African Cichlid tank, you would always want to over-filtrate to ensure these harmful waste products are removed from your tank.
So, all the waste in your tank falls under the category of bio load. This waste helps you determine the right time for cleaning your tank with water changes and gravel vacs and helps you set a proper cleaning schedule for your Fluval FX6 Canister.
If you see a lot of fish poop, food, or blurriness in the water, it could indicate a high amount of bio load, and it needs to be addressed immediately to keep your aquarium functioning smoothly. I can’t tell you how many times I have let bio load destroy my aquarium’s optimal conditions before learning how to understand it and take care of it properly.
A heavy bio load is what eventually clogs up your filter media and decreases the efficiency of your filter. For proper setup of your filter media for maximum efficiency check this article out – Fluval FX6 Media Setup
Water Conditions Can Indicate When It’s Time to Clean Your FX6
Other than bio load, water conditions inside the tank also help you determine the right time to clean your FX6. If the water appears to be blurry or whiteish rather than transparent, it is time to get busy and clean the tank. The absence could mean a higher bio load and foreign contaminants in your tank that need to be taken care of immediately.
Crystal Clear Water Does Not Mean Optimal Water Parameters
On the other hand, having a crystal clear tank does not necessarily indicate optimal water parameters. The crystal-clear water is good for your aquarium but it can be deceiving. You would still need to take the time out to regularly test your water for any unwarranted ammonia spikes, algae growth, or other harmful contaminants and ensure that your water is livable for the fish.
I had this issue when my aquarium was in a perfect state, apparently, but my fish started getting sick. Upon testing the tank water, I found out that there were elevated levels of nitrates which is harmful to the fish when in excess and it was slowly making my fish sick. If you want to keep your tank habitable for your fish, make sure you regularly test your water and do water changes.
How to Clean Your FX6?
Now that you know when to clean your aquarium with an FX6 filter, it is time to learn how to clean FX6. Here are a few steps to get you started with cleaning your FX6.
- The first thing you need to do is shut off your aqua stop valves. It is recommended to shut off the inlet valve before shutting off the outlet valve. Once you have closed the valves, you will unplug your FX6 from the power source.

- Now, you will move on to the water exchange valve at the bottom of your canister. You will remove the exchange valve and connect the respective hose with the canister filter. This will be your entry point for eliminating all waste and refiling the canister filter with clean water.
- You will now place the hose inside a bucket and remove the outlet valve altogether from the canister. This valve will require both hands since you have to press down on the spring while simultaneously pulling the outlet valve in the upward direction. Make sure to use a towel in case of any spillages.
- Once the outlet valve is removed, you will open up the water exchange valve and let the hose do its job. Remember that you will only be able to remove half the water from the canister, and it will match the level of water in the bucket. This is basic physics. I remember the first time I tried this, I waited for half an hour for the water to completely drain from the canister, but it never did. That is when I learned that the water would never be fully removed, and this was just to lighten the canister’s weight.
- The canister should be lighter now. You can shut off the water exchange valve, remove the inlet valve, and take out the canister FX6 filter from underneath the tank.
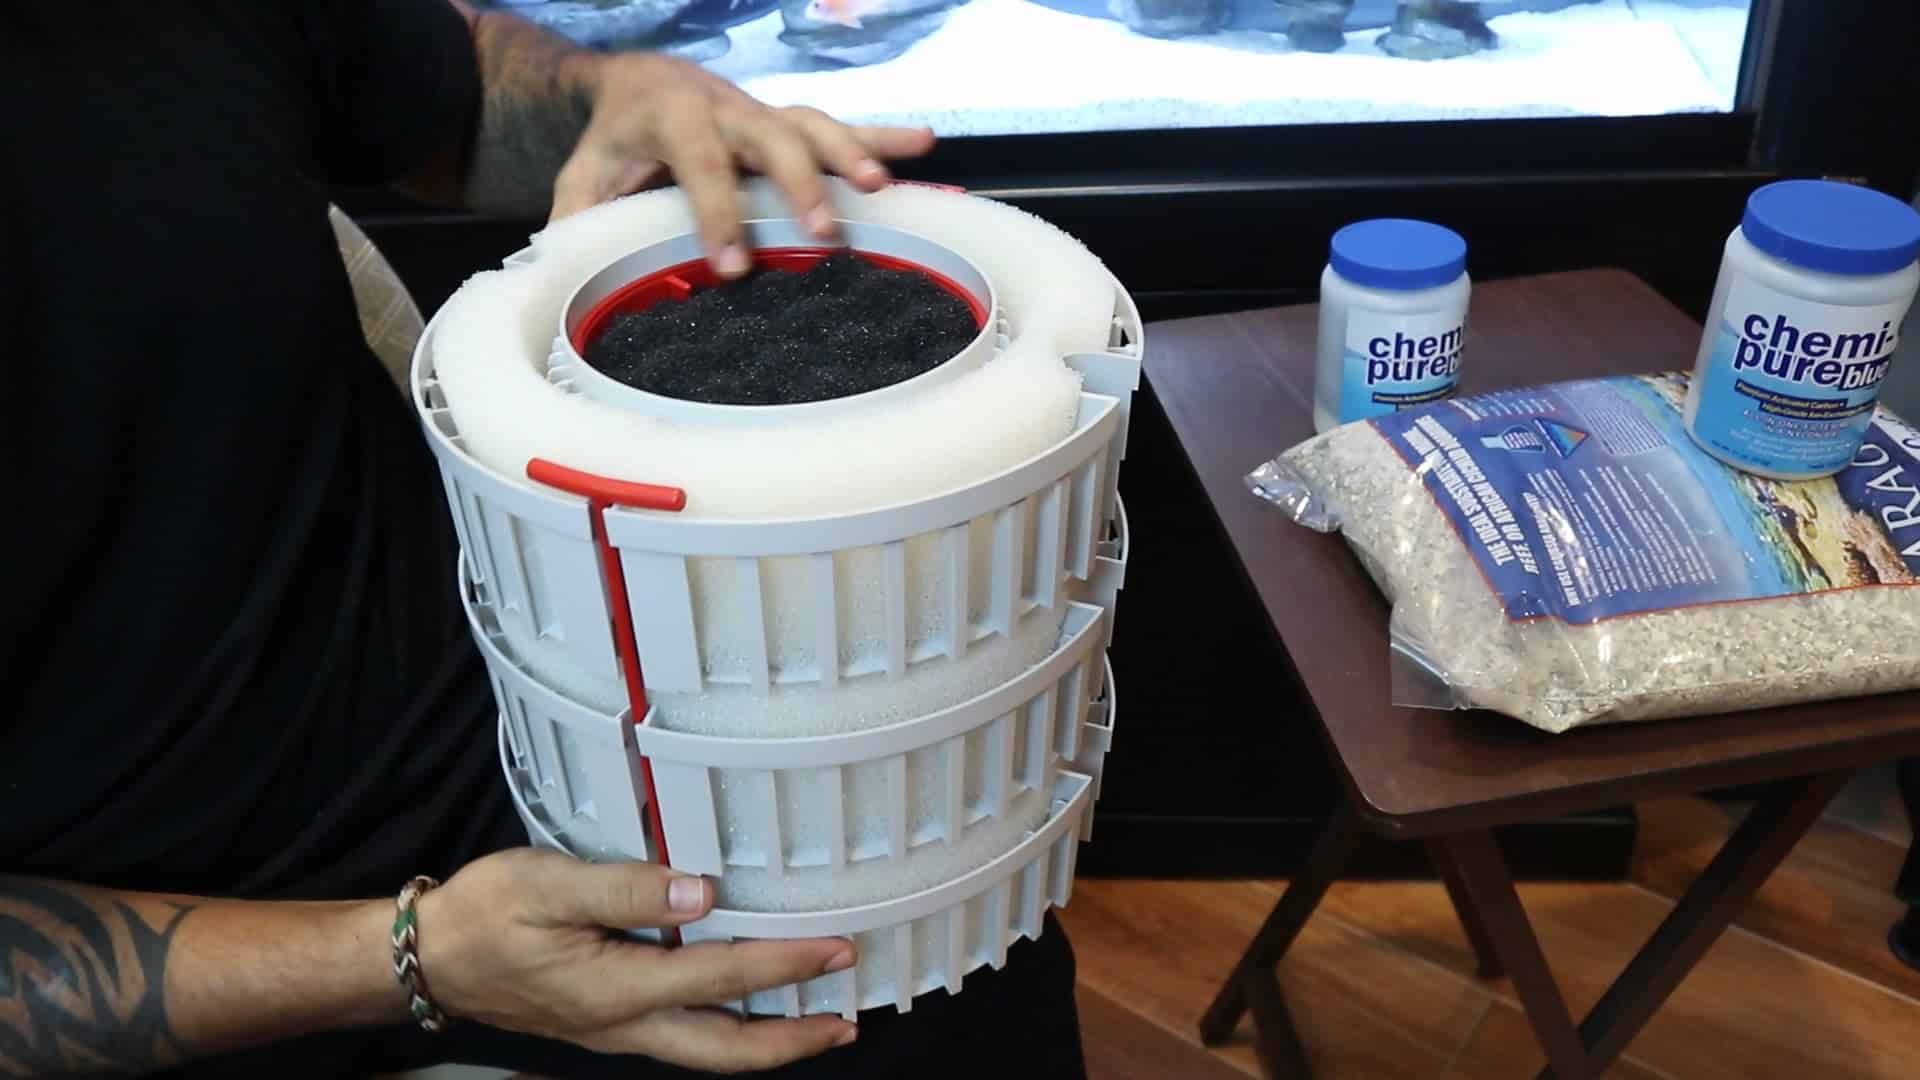
- If you see any gunk on your bio media, you have waited too long to clean the filter. This can help you determine an appropriate cleaning schedule for your FX6 filter. If you use carbon, you will have to clean the filter every month.

- You will now remove the bio-media from the tray and clean it with the CANISTER water that you removed earlier. Do not clean it with tap water; otherwise, you will destroy the beneficial bacteria required for your tank. Use the canister water/tank water to clean it.
- Make your way through the different bio trays, and get to the bottom tray where you will find charcoal padding or any chemical media you were using depending upon your preferences. It is recommended to change these depending on their respective state. If they are too dirty or greasy, toss them in the trash and get clean replacements.
- Now, you will take out the sponges and clean them with CANISTER water. If you clean this with tap water, you will harm the integrity of beneficial bacteria that are useful for your filter and the tank. Ensure that you get the gunk off these sponges and clean them with canister water. However, you can take care of the sponge baskets with clean tap water. These are only meant to keep the sponges in place.
- When you are cleaning sponges, make sure to put the bio media trays inside the aquarium itself. This is to preserve the beneficial bacteria in these bio-media trays while you dry off your sponges.
- The only thing you have to clean now is the canister itself. You can use tap water to clean the baskets, impeller, and the canister itself. When cleaning is completed fill the canister about halfway with de-chlorinated water.
- Now, you just have to put everything back into its place and put the filter back underneath the aquarium. You should work your way up from the bottom tray and ensure that everything is in place and is not loose.

- Reconnect the valves with the canister FX6 filter, and open them up. You will open them in the same order when you take them off. Open up the inlet valve first, and then open up the outlet valve. You should hear water running through and filling up your FX6.
- Once your FX6 is full, plug in the power cord.
- Congratulations, you have successfully cleaned your FX6 filter.
Keeping Track of When Your Next Cleaning Should Be
Cleaning the FX6 filter is not enough. You should become familiar with the underlying elements of a hazardous and non-livable environment for your fish and keep track of your next cleaning schedule. This will help you stay ahead of problems, and you can keep your tank in an optimal condition.
If you notice a lot of gunk on your bio media during the cleaning session, you may be waiting too long. The gunk and waste should be caught by your sponges which is your mechanical filtration and should never reach the bio media tray. This is how you can gauge your cleaning session requirements and decide when to clean your FX6 filer next.


